Toshiba Portege 3010 & 3020
Modifying the Portege
Despite its small size, the Portege is quite easy to dismantle. This allows for easy repair, replacement and customisation of parts.
On this page:
- Removing the Hard Disk
- Replacing the Hard Disk
- Replacing the Hard Disk with CompactFlash
- Replacing the Memory
- Painting the Portege
- Other Modifications
Removing the Hard Disk
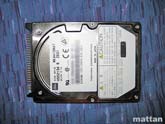
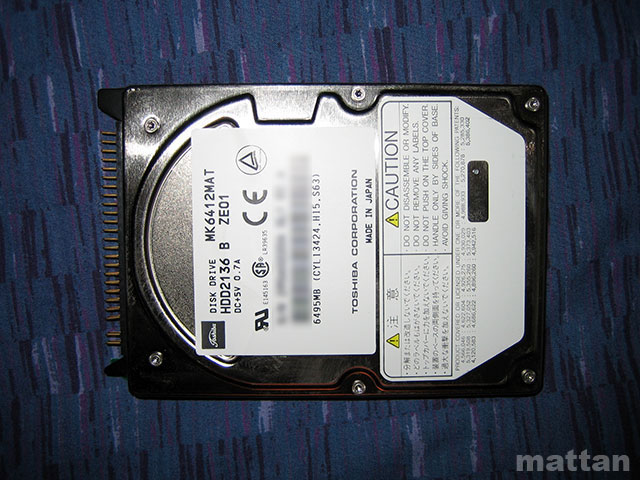
Upgrading the hard drive is a straight-forward task. The greatest difficulty might be finding an 8.45 mm, 2.5-inch drive. There should be enough clearance in the case for a 9.0 mm or 9.5 mm drive, but you'll have to remove the rubber pads above and below the disk, and cut the drive sleeve to fix it around the new drive. Here's how to remove the disk:
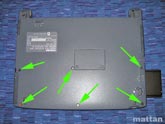
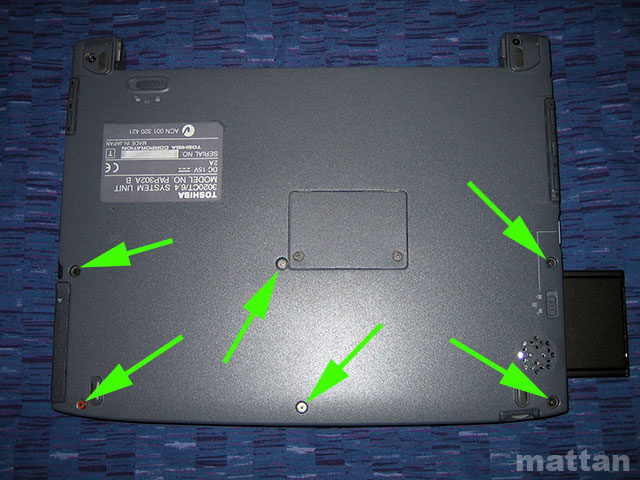
- After disconnecting the power cord and removing the battery, flip the notebook onto it's lid. Remove the six highlighted screws.
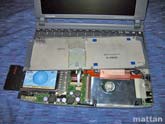
- Open the notebook and flip the lower casing (mouse buttons) onto the keyboard.
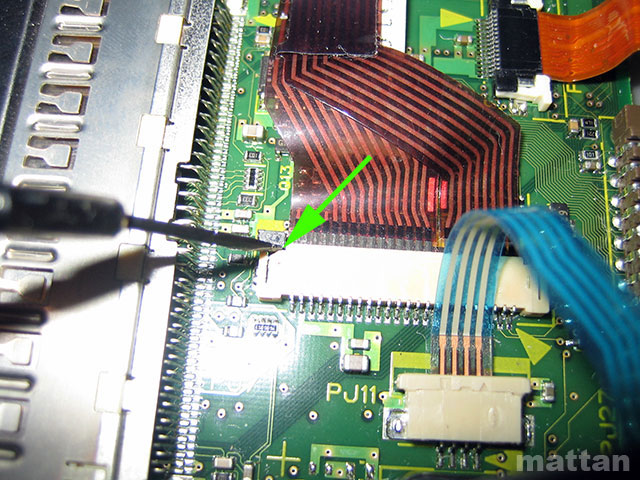
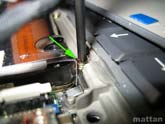
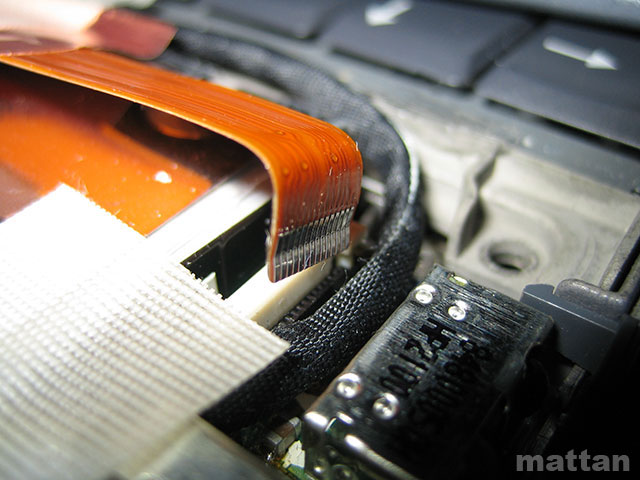
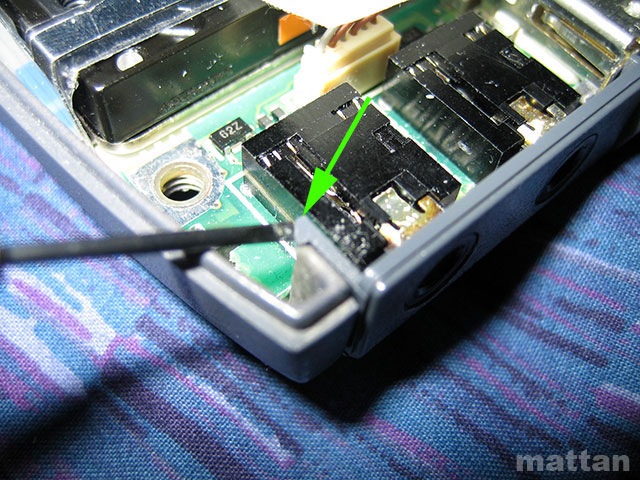
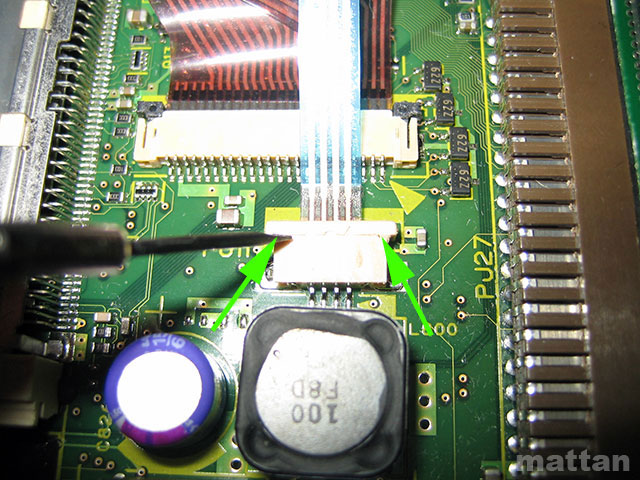
- Use a small flathead screwdriver to pry both sides of the white clip that holds the orange data cable. Once the clips are loosened, the cable should come free.
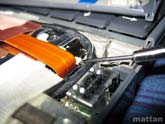

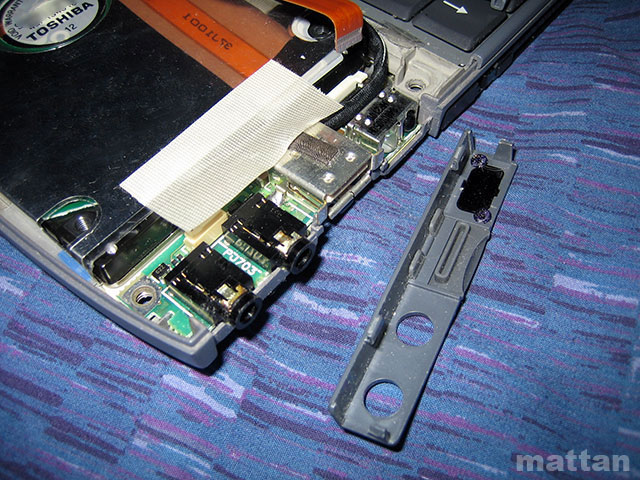
- Pry free the two small plastic clips that hold the USB/audio/IR cover in place, and with some careful wiggling the cover should come free.

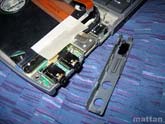
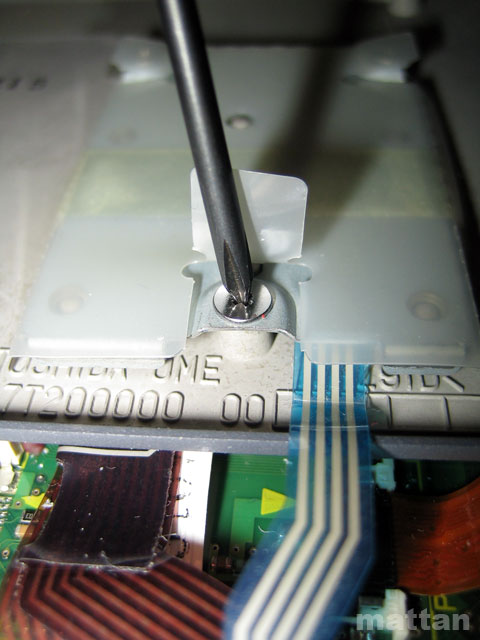
- Unscrew the small metal clip that holds the USB module in place, and the module should then come free of the case.
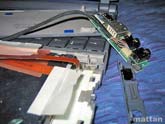
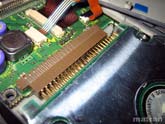
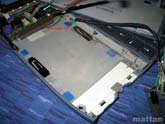
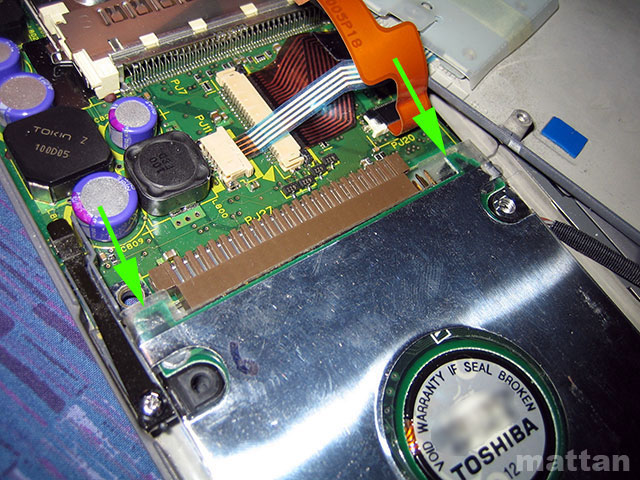
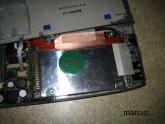
- Carefully wiggle the HDD by applying pressure to the highlighted points, and the HDD should come free of the socket. It can then be removed from the case.


Replacing the Hard Disk
Replacing the drive is the reverse procedure to the above. Don't forget to reuse the anti-static sleeve from the old hard disk. Javier Hernandez has some photos of replacing the hard disk in a 3010.
Replacing the Hard Disk with CompactFlash
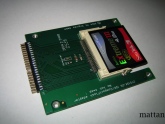
Tested with a CompactFlash to 2.5" IDE Adapter manufactured by PC Engines, and a SanDisk Extreme III 4 GB CompactFlash card (SDCFX3-4096):
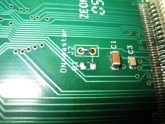
- Removed the 'R1' resistor on the IDE-CF adapter, and shorted the 'J2 pins' to force the device to be master. The default is Cable Select, but apparently the Portege doesn't know how to handle that.
- Put CF into IDE-CF adapter, removed HD and replaced it with the IDE-CF device.
- Created a Windows 98 floppy boot disk, and copied the SanDisk ATCFWCHG utility (atcfwchg.com - "NAND Athens ID Drive Config Word (Fixed/Removable) Change Utility Version 1.4") to the floppy.
- Booted from the floppy disk.
- Using FDISK, deleted any existing partitions on the CF drive and created a new partition.
- Restarted machine, booting from floppy again.
- Formatted the CF drive using 'format c: /s /u'.
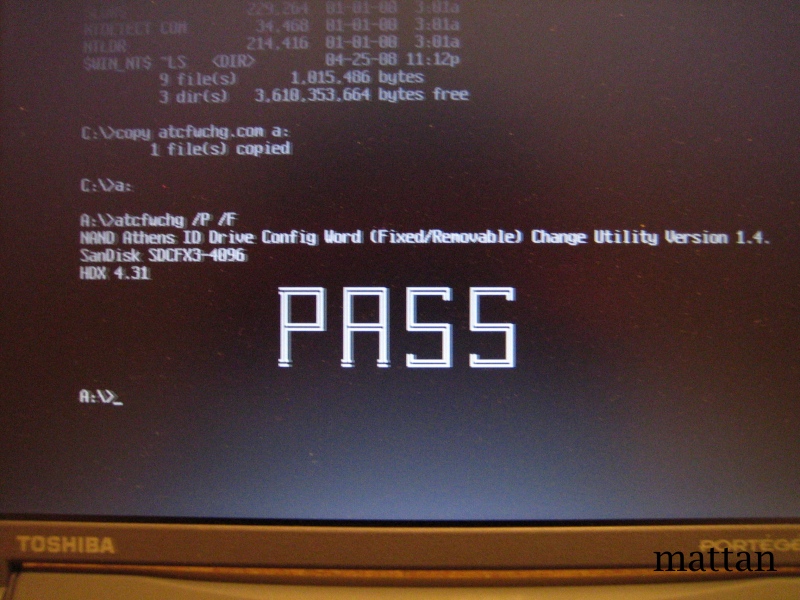
- Ran the atcfwchg.com utility from the floppy: 'atcfwchg.com /P /F'. This is necessary to change the CF card from 'removable disk' mode to 'fixed disk' mode. Windows won't install if it's 'removable disk'.

- Removed the IDE-CF adapter, then removed CF card from the adapter and connected the card to another computer with a USB CF reader.
- Copied the 'i386' folder from the Windows 2000 installation CD onto the CF card.
- Put the CF card back into the IDE-CF adapter, and put the adapter back into the Portege.
- Booted from the CF card. It boots to DOS (because the '/s' switch was used when formatting it).
- Started Windows 2000 Setup: 'cd i386' then 'winnt'.
- Installed Windows.


What would I do differently? I would probably use a different IDE-CF adapter (one that supports UDMA) and a CF card that supports UDMA and fixed disk mode 'out of the box'. This is because in my current setup, Windows will only use 'PIO mode', instead of the Multiword DMA Mode 2 that I know the card supports. I think PIO mode is down to either the adapter or the proprietary Toshiba chipset, as I've tried all sorts of tricks to try to force DMA mode but nothing has worked. At the moment I'm getting a maximum read speed of 3.2 MB/sec, but the card should support upwards of 20 MB/sec.
Replacing the Memory
There's a guide from Kingston Technology (PDF, 105 KB) to upgrading the memory, but Kingston no longer makes any memory modules for the 3010 & 3020. You might see a 32/64 MB module available on eBay.
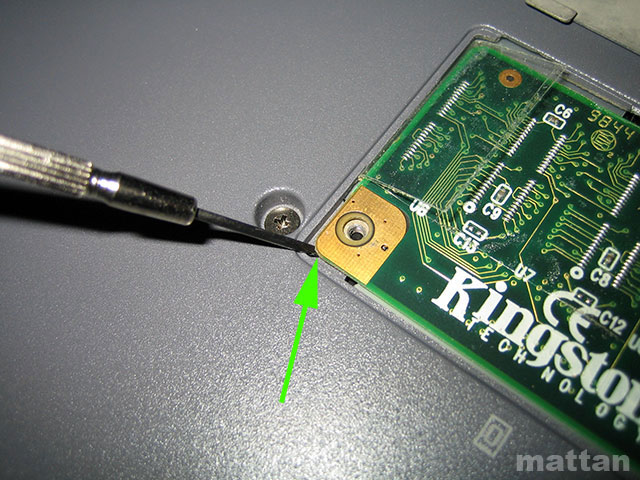
To remove the memory, disconnect the power sources and remove the two screws that hold the memory cover then carefully pry free the memory module. Alternatively, some modules may have a plastic tab that allows them to be removed more easily:
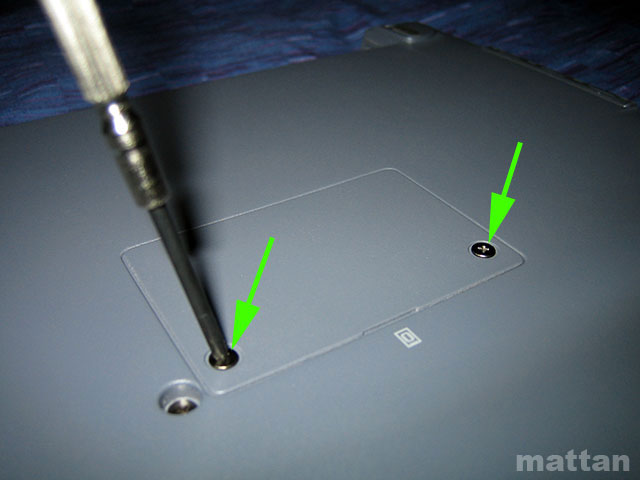
The new module can then be placed into position by aligning the screw holes and gently applying pressure to the connector side.
After reconnecting the power, boot into the BIOS (hold the ESC key and power-on) and check that the correct amount of memory is being reported. If not, make sure the module is seated properly and that the cover plate is held securely.
Painting the Portege
The magnesium alloy lid is a good candidate for painting.
The Toshiba logo on the lid is removable - each letter is actually a sticker that can be carefully scraped off.
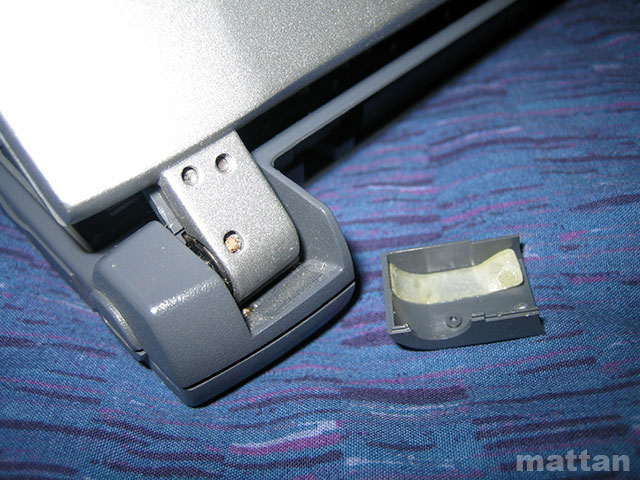
The hinge covers, which are held on by double-sided tape, need to be removed to paint the lid. Pry the cover free with a flathead screwdriver:

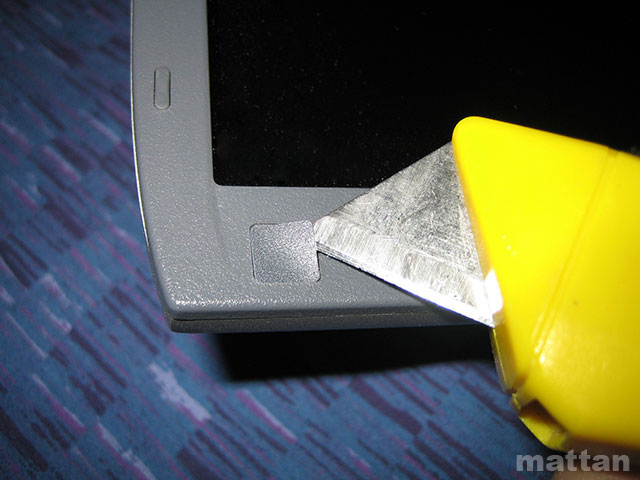
To isolate the magnesium alloy lid, the display needs to be unscrewed. Use a blade or very small screwdriver to remove the four adhesive screw covers on the display, then remove the screws:

The plastic frame, which is held by small tabs, can then be carefully pried from the lid. Take care when removing the frame as it is very fragile, and there is circuitry on the right-hand side of the display.
You can also try painting the dark grey plastic parts of your notebook to give it a funky new look. Sand each section with a fine-grit sandpaper then paint with your choice of polycarbonate coating.
John T has some great information and photos on painting the lid of his Portege 3110. This involved some tedious masking and a very cheerful shade of red paint. Looks great!
Other Modifications
There have been efforts to increase the clock speed of a 3010 from 66 MHz to 75 MHz, thus increasing the processor speed to 300 MHz. I don't know if the computer needs extra cooling after this mod - I guess not seeing as the 3020 runs at 300 MHz natively.
The AccuPoint buttons can be removed by freeing the lower panel (see 'Removing the Hard Disk' above), then prying free the cable clip and removing the three screws on the button module:
Similarly, after freeing lower panel, the keyboard is removed by unplugging the keyboard/pointer connectors and then levering a screwdriver between the top of the keyboard and the upper chassis: